skip to main |
skip to sidebar
Wednesday, November 5, 2014
Posted by
Corey Harrell
An alert fires about an end point potentially having a security issue. The end point is not in the cubicle next to you, not down the hall, and not even in the same city. It's miles away in one of your organization's remote locations. Or maybe the end point is not miles away but a few floors from you. However, despite its closeness the system has a one terabyte hard drive in it. The alert fired and the end point needs to be triaged but what options do you have. Do you spend the time to physically track down the end point, remove the hard drive, image the drive, and then start your analysis. How much time and resources would be spent approaching triage in this manner? How many other alerts would be overlooked while the focus is on just one? How much time and resources would be wasted if the alert was a false positive? In this post I'll demonstrate how the Tr3secure collection script can be leveraged to triage this type of alert.
Efficiency and Speed Matters
Triaging requires a delicate balance between thoroughness and speed. Too much time spent on one alert means not enough time for the other alerts. Time is not your friend when you are either trying to physically track down a system miles away or imaging a hard drive prior to analysis. Why travel miles when milliseconds will do? Why collect terabytes/gigabytes when megabytes will do? Why spend time doing deep dive analysis until you confirm you have to? The answer to all these questions is to walk the delicate balance between thoroughness and speed. To quickly collect only the data you need to confirm if the alert is a security event or false positive. The tools one selects for triage is directly related to their ability to be thorough but fast. One crop of tools to help you strike this balance are triage scripts.
Triage scripts automate parts of the triage process; this may include either the data collection or analysis. The Tr3secure collection script automates the data collection. In my previous post - Tr3Secure Collection Script Updated - I highlighted the new features I added in the script to collect the NTFS Change Journal ($UsnJrnl) and new menu option for only collecting NTFS artifacts. Triaging the alert I described previously can easily be done by leveraging Tr3Secure collection script's new menu option.
To demonstrate this capability I configure a virtual machine in an extremely vulnerable state then visited a few malicious sites to provide me with an end point to respond to.
Responding to the System
The command prompt was accessed on the target system. A drive was mapped to a network share to assist with the data collection. The network share not only is where the collected data will be stored but it is also where the Tr3Secure collect script resides. The command below uses the Tr3Secure collection script NTFS artifacts only option and stores the collected data in the network share with the drive (Y:). Disclaimer: leveraging network shares does pose a risk but it allows for the tools to be executed without being copied to the target and for the data to be stored in a remote location.
The image below shows part of the output from the command above.
The following is the data that was collected using Tr3secure collection script's NTFS artifacts only option:
- Recentfilecach.bcf
- Prefetch files
- Master File Table ($MFT)
- NTFS Change Journal ($UsnJrnl)
- NTFS Logfile ($Logfile)
Triaging
Collecting the data is the first activity in triaging. The next step is to actually examine the data to confirm if the alert is an actual security event or a false positive. The triage process will vary based on what the event is. A fast spreading worm varies from a Trojan. Antivirus alerts vary from malicious network traffic (i.e. an end point communicating with a malicious IP). The scenario demonstrated in this post is for an alert firing that requires triaging an end point. There are certain indicators to look for when triaging end points for malware as outlined below:
- Programs executing from temporary or cache folders
- Programs executing from user profiles (AppData, Roaming, Local, etc)
- Programs executing from C:\ProgramData or All Users profile
- Programs executing from C:\RECYCLER
- Programs stored as Alternate Data Streams (i.e. C:\Windows\System32:svchost.exe)
- Programs with random and unusual file names
- Windows programs located in wrong folders (i.e. C:\Windows\svchost.exe)
- Other activity on the system around suspicious files
In addition to looking for the above indicators, it is necessary to ask yourself a few important questions.
1. What was occurring on the system around the time the alert generated?
2. Is there any indicators in the alert to use examining the data?
3. For any suspicious or identified malicious code, did it execute on the system?
The triage steps to use is dependent on the collected data. In this case, the data collected with NTFS artifacts option results in only examining: program execution and filesystem activity. These two examination steps are very effective for triaging end points as I previously illustrated in my post Triaging Malware Incidents.
Examining Program Execution Artifacts
The first artifact to check is the Recentfilecach.bcf to determine if any stand-alone programs executed on the endpoint. The file can be examined using a hex editor or Harlan's rfc.exe tool included in his WFA 4/e book materials. The command below parses this artifact:
rfc.exe C:\Data-22\WIN-556NOJB2SI8-11.04.14-19.36\preserved-files\AppCompat\RecentFileCache.bcf
The image below is highlighting a suspicious program. The program stands out since it is a program that executed from the lab user profile's temporary internet files folder. Right off the bat this artifact provides some useful information. The coffee.exe program executed within the past 24 hours, the program came from the Internet using the Internet Explorer web browser, and the activity is associated with the lab user profile.
The second program execution artifact collected during the NTFS artifacts only option are prefetch files. The command below parses this artifact with Winprefetchview:
winprefetchview.exe /folder C:\Data-22\WIN-556NOJB2SI8-11.04.14-19.36\preserved-files\Prefetch
The parsed prefetch files were first sorted by process path to find any suspicious programs. Then they were sorted by last run time to identify any suspicious programs that executed recently or around the time of the alert. Nothing really suspicious jumped out in the parsed prefetch files. However, there was a svchost.exe prefetch file and this was examined since it may contain interesting file handles related to the suspicious program listed in the Recentfilecach.bcf. (to see why review my Recentfilecach.bcf post and pay close attention to where I discuss the process svchost.exe) This could be something but it could be nothing. The svchost.exe process had a file handle to the ad[2].htm file located in the temporarily internet files folder as shown below:
Examining Filesystem Artifacts
The Tr3Secure collection script collects the NTFS $MFT, $Logfile, and $UsnJrnl; all of which can provide a wealth of information. These artifacts can be examined in two ways. First is to parse them and then look at the activity around the time the alert fired. Second, is to parse them and then look at the activity around the time of the identified suspicious files appeared on the system. In this post I'm using the latter method since the alert is hypothetical.
The $MFT was parsed with Joakim Schicht's MFT2CSV program. The output format is in the log2timeline format to make it into a timeline.
The MFT2CSV csv file was imported into Excel and a search was performed for the file "coffee.exe". It's important to look at the activity prior to this indicator and afterwards to obtain more context about the event. As illustrated below, there was very little activity - besides Internet activity - around the time the coffee.exe file was created. This may not confirm how the file got there but it does help rule out certain attack avenues such as drive-by downloads.
The image below shows what occurred on the system next. There is activity of Java executing and this may appear to be related to a Java exploit. However, this activity was due to Java update program executing.
The last portion of the $MFT timeline is shown below. A file with the .tmp extension was created in the temp directory followed by the creation of a file named SonicMaster.exe in the System32 folder. SonicMaster.exe automatically becomes suspicious due to its creation time around coffee.exe (guilty by association.) If this is related then that means the malware had administrative rights, which is required to make modifications to the System32 folder. The task manager is executed and then there was no more obvious suspicious activity in the rest of the timeline. The remaining activity was the lab user account browsing the Internet.

At this point the alert has been properly triaged and confirmed. The event can be escalated according to the incident response procedures. However, addition context can be obtained by parsing the NTFS Change Journal ($UsnJrnl). Collecting this artifact was the most recent update to the Tr3Secure collection script. The $UsnJrnl was parsed with Joakim Schicht's UsnJrnl2CSV program.
The UsnJrnl2CSV csv file was imported into Excel and a search was performed for the file "coffee.exe". It's important to look at the activity prior to this indicator and afterwards to obtain more context about the event. The $UsnJrnl shows the coffee.exe file being dropped onto the system from the Internet (notice the [1] included in the filename.)
The next portion as shown below, shows coffee.exe executing, which resulted in the modification to the Recentfilecache.bcf. Following this the tmp file is created along with the SonicMaster.exe file. The interesting activity is the data overwrites made to the SonicMaster.exe file after it's created.
Immediately after the SonicMaster.exe file creation the data overwrites continued to other programs as illustrated below. To determine what is happening would require those executables to be examined but it appears they had data written to them.
The executables were initially missed in the $MFT timeline since the files by themselves were not suspicious. They were legitimate programs located in their correct folders. However, the parsed $UsnJrnl provided more context about the executables and circling back around to the $MFT timeline shows the activity involving them. Their $MFT entries were updated.
Conclusion
As I mentioned previously, triaging requires a delicate balance between thoroughness but speed. It's a delicate balance between quickly collecting and analyzing data from the systems involved with an alert to determine if the alert is a security event or false positive. This post highlighted an effective technique for triaging an end point and the tools one could use. The entire technique takes minutes to complete from beginning to end. The triage process did not confirm if the activity is a security event but it did determine additional time and resources needs to be spent digging a bit deeper. Doing so would had revealed that the coffee.exe file is malicious and is actually the Win32/Parite file infector. The malware infects all executables on the local drive and network shares. Digging even deeper by performing analysis on coffee.exe (Malwr report and Anubis report) matches the activity identified on the system and even provides more indicators (such as an IP address) one could use to search for other infections in the environment.
Tuesday, October 28, 2014
Posted by
Corey Harrell
On my to-do list for some time has been to add support back into the Tr3Secure collection script to obtain the NTFS Change Journal ($UsnJrnl). This is a quick post about this functionality being added back to the collection script.
The issue I faced was the following. There are very few tools capable of collecting NTFS artifacts from live systems; even fewer for collecting the $UsnJrnl. The Tr3Secure script uses Joakim Schicht's tool RawCopy to collect files off of live systems. It is one of the few and - as far as I know - the only open source option. Rawcopy pulls files either by their $MFT record number or the file path. Pulling NTFS artifacts requires the $MFT record number. The challenge is the $UsnJrnl does not have a consistent $MFT record number like the other NTFS artifacts. For most scripting languages this wouldn't be an issue but Tr3Secure is a batch script. Batch scripting doesn't support storing a command's output into a variable. Translation: there is not an easy way in batch scripting to query the $UsnJrnl's $MFT record number, store it into a variable, and then use that variable with RawCopy to collect it. This is why adding the functionality back into the script has been and remained on my to-do list until now.
Joakim Schicht's ExtractUsnJrnl
Joakim Schicht does outstanding work producing DFIR tools and releasing them open source. His Github site contains a wealth of tools. He even has a collection of tools for the collection and parsing of NTFS artifacts. For those who aren't familiar with his work then I highly advise you take the time to explore them (also his Google Code wiki page.) He recently released a new tool called ExtractUsnJrnl. The tool - in Joakim's words - does the following:
"$J may be sparse, which would mean parts of the data is just 00's. This may be a significant portion of the total data, and most tools will extract this data stream to its full size (which is annoying and a huge waste of disk space). This is where this tools comes in, as it only extract the actual data for the change journal. That way extraction obviously also goes faster. Why extract 20 GB when you might only need 200 MB?"
The tool not only collects the $UsnJrnl $J alternate data stream but it only extracts the portion containing data. This not only saves space but it makes the collection faster; especially if pulling it over the wire. The tool is command-line making it easy to script with. I updated the Tr3Secure collection script to use the ExtractUsnJrnl tool for grabbing the $UsnJrnl.
ExtractUsnJrnl in Action
ExtractUsnJrnl is really a cool tool so I wanted to take the time to highlight it. I performed a simple test. Collect the $UsnJrnl $J file with one tool (FTK Imager) to see how long it takes and what the file size is then use ExtractUsnJrnl.
The image below shows the $UsnJrnl from a 1TB solid state drive. The file size difference is significant; one file is 4.6GB while the other is 36MB. Both tools were ran locally but ExtractUsnJrnl completed within seconds.
The image below shows the $UsnJrnl from a 300GB removable drive. Again, notice the difference between the file sizes.
Some may be wondering why am I so focused on the resulting file size. The reason is trying to pull a 4.6GB file over the wire from a remote system takes time. A lot of time if that remote system is in a location with a slow network link (think VPN users). By reducing the file size (i.e. 36MB) makes it easier to collect the $UsnJrnl both remotely and locally to an attached storage device.
The next test I ran was to parse both $UsnJrnl $J files to see if the both contain around the same number of records. I said approximate because the hard drives were not write protected and changes may had been made between the collections. Due to this I evaluated the removable store device's NTFS Change Journal since the drive had less activity than the solid state drive.
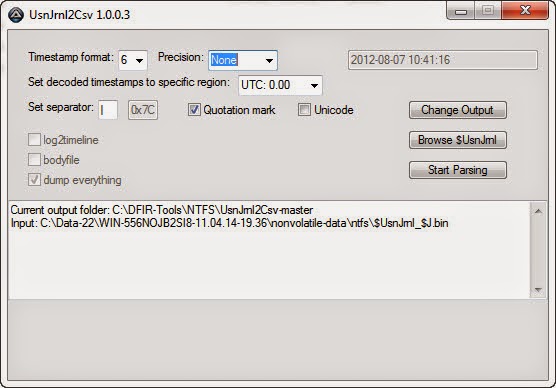
The image below shows UsnJrnl2Csv successfully parsing the $UsnJrnl $J extracted with FTK Imager.
The image below shows UsnJrnl2Csv successfully parsing the $UsnJrnl $J extracted with ExtractUsnJrnl. Notice how this $J file had significantly less records.
Lastly, the image below shows the comparison of the two parsed $UsnJrnl $J files from the removable media. Both outputs start at the same time with the same file and end at the same time with the same file.
Another Tr3Secure Collection Update
Adding support to collect the $UsnJrnl is not the only update. The change log lists out all of them but I did want to highlight another one. An additional menu option was added to only collect the NTFS artifacts. There are times where I want to create a quick timeline with the NTFS artifacts to get more information about something. For example, an antivirus alert may had flagged a file but I'm interested in if anything else was dropped onto the system. In an instance like this, creating a timeline with both the $MFT and $UsnJrnl can quickly answer this question. I've been using a different collection script to grab just the NTFS artifacts but I decided to incorporate the functionality into the Tr3secure script. The menu option now appears as the following:
Selecting option 5 will only preserve select files then collect the $MFT, $Logfile, and $UsnJrnl.
You can download the TR3Secure Data Collection Script from the following download site. The link is also posted along the right hand side of this blog towards the top.
In the future I plan on doing a post or two illustrating how targeted collections using scripts - such as the Tr3secure collection script - can significantly speed up the time it takes to triage an alert or system.
Tuesday, August 19, 2014
Posted by
Corey Harrell
This post is a quick update about a few things I've been working on over the years.
auto_rip updates
auto_rip is a wrapper script for Harlan Carvey's RegRipper and the script has a few updates. For those unfamiliar with the program please refer to my post Unleashing auto_rip. The script's home has always been on the RegRipper Google Code site but Google dropped support for adding new downloads. As a result, I thought it might be helpful to make newer versions available at different places since Google Code can no longer be used. One of the download locations where the script will be available is Google Drive. The link to the download folder is located here. In addition, along the right side of this blog is a link to the script's download location.
Harlan has put in a ton of work on Regripper and in the spring he released some updates to the program. Inside the downloadable archive he made available a file named updates.txt that outlines all of the work he did. New plug-ins, combined plug-ins, retiring plug-ins, etc.. Needless to say, an outstanding tool is now even better. After Harlan released the updates others asked if I was going to update auto_rip to match. Things have been busy so it took longer than I wanted. However, I finally updated auto_rip to account for the new RegRipper updates.
The latest auto_rip download works with the RegRipper rr_20140414.zip download. All changes are noted at the top of the code. The changes include: adding plug-ins to parse, removing plug-ins no longer supported, adding the malware category (not all malware plug-ins run), and parsing the AMcache.hve registry hive with a new switch (Harlan, awesome job making this plug-in). I also renamed the executed to reflect it is 64bit and won't work on 32bit systems. Harlan, again thanks for all the work you put into maintaining the project.
tr3secure_collection_script
Another script I released is the tr3secure_collection_script. This script automates the collection of volatile and non-volatile data from systems to support incident response activities. For more information about the script refer to my posts: Dual Purpose Volatile Data Collection Script and Tr3Secure Data Collection Script Reloaded. This script was another Google Code causality and had to find a new home (Google Drive again.) The link to the download folder is located here. In addition, along the right side of this blog is a link to the script's download location.
Besides getting a new home there is only one small change in this version. I dropped support for pv.exe since it is no longer downloadable. At some point in the future there may be another update on this front.
Digital Forensic Search Update
I have been keeping track of the various blogs and websites to add to the Digital Forensic Search over the past six months. I finally added the new sites to the index. To access the custom Google you can use this link directly. To see the full list of what is included in the index refer to the post: Introducing the Digital Forensics Search.
Tuesday, September 24, 2013
Posted by
Corey Harrell
Triage is the assessment of a security event to determine if
there is a security incident, its priority, and the need for escalation. As it
relates to potential malware incidents the purpose of triaging may vary. A few potential questions triaging may address are: is
malware present on the system, how did it get there, and what was it trying to
accomplish. To answer these questions should not require a deep dive
investigation tying up resources and systems. Remember, someone needs to use
the system in question to conduct business and telling them to take a 2 to 4
hour break unnecessarily will not go over well. Plus, taking too much time to
triage may result in the business side not being happy (especially if it occurs
often), the IT department wanting to just re-image the system and move on, and you limit your ability to look in
to other security events and issues. In this post I'm demonstrating one method
to triage a system for a potential malware incident in less than 30 minutes.
The triage technique and the tools to use is something I've
discussed before. I laid out the technique in my presentation
slides Finding Malware Like Iron Man. The presentation also covered the
tools but so has my blog. The Unleashing
auto_rip post explains the RegRipper auto_rip
script and the Tr3Secure
Data Collection Script Reloaded outlines a script to collect data thus
avoiding the need for the entire hard drive. The information may not be new
(except for one new artifact) but I wanted to demonstrate how one can leverage
the technique and tools I discussed to quickly triage a system suspected of
being infected.
The Incident
As jIIr is my personal blog, I'm unwilling to share any
casework related to my employer. However, this type of sharing isn't even
needed since the demonstration can be conducted on any infected system. In this
instance I purposely infected a system using an active link I found on URLQuery. Infecting the system in this manner
is a common way systems are infected everyday which makes this simulation
worthwhile for demonstration purposes.
Responding to the System
There are numerous ways for a potential malware incident to
be detected. A few include IDS alerts, antivirus detections, employees
reporting suspicious activity, or IT discovering the incident while trying to
resolve a technical issue. Regardless of the detection mechanism, one of the
first things that have to be done is to collect data for it to be analyzed. The
data is not only limited to what is on the system since network logs can
provide a wealth of information as well. My post’s focus is on the system's
data since I find it to be the most valuable for triaging malware incidents.
Leverage the Tr3Secure Data Collection Script to collect the
data of interest from the system. The command below assigns a case number of 9-20,
collects both volatile and non-volatile data (default option), and stores the
collected data to the drive letter F (this can be a removable drive or a mapped
drive).
tr3-collect.bat 9-20 F
The second script to leverage is the TR3Secure Data
Collection Script for a User Account to collect data from the user profile of
interest. Most of the time it's fairly easy to identify the user profile of
interest. The detection mechanism may indicate a user (i.e. antivirus logs),
the person who uses the system may have reported the issue, the IT folks may
know, and lastly whoever is assigned the computer probably contributed to the
malware infection. The command below collects the data from the administrator
and stores it in the folder with the other collected data.
tr3-collect-user.bat
F:\Data-9-20\WIN-556NOJB2SI8-09.20.13-11.40 administrator
The benefit to running the above collection scripts over
taking the entire hard drive is twofold. First, collection scripts are faster
than removing the hard drive and possibly imaging it. Second, it limits the
impact on the person who uses the system in question until there is a
confirmation about the malware incident.
Triaging the System
For those who haven't read my presentation
slides Finding Malware Like Iron Man I highly recommend you do so to fully
understand the triage technique and what to look for. As a reminder the triage
technique involves the following analysis steps:
- Examine the Programs Ran on the System
- Examine the Auto-start Locations
- Examine File System Artifacts
When completing those steps there are a few things to look
for to identify artifacts associated with a malware infection. These aren't
IOCs but artifacts that occur due to either the malware characteristics or
malware running in the Windows environment. Below are the malware indicators to
look for as the analysis steps are performed against the data collected from
the system.
- Programs executing from temporary or cache folders
- Programs executing from user profiles (AppData, Roaming,
Local, etc)
- Programs executing from C:\ProgramData or All Users
profile
- Programs executing from C:\RECYCLER
- Programs stored as Alternate Data Streams (i.e.
C:\Windows\System32:svchost.exe)
- Programs with random and unusual file names
- Windows programs located in wrong folders (i.e.
C:\Windows\svchost.exe)
- Other activity on the system around suspicious files
Examine the Programs Ran on the System
The best way to identify unknown malware on a system is by
examining the program execution artifacts. For more information about these
artifacts refer to my slide deck, Harlan's HowTo:
Determine Program Execution post, and Mandiant's Did It Execute? post. To
parse most of the program execution artifacts run Nirsoft's WinPrefetchView
against the collected prefetch files and auto_rip along
with RegRipper against the collected registry hives. Note: the analysis should
be performed on another system and not system being analyzed. Below is the
command for WinPrefetchView:
winprefetchview.exe
/folder H:\ Data-9-20\WIN-556NOJB2SI8-09.20.13-11.40\preserved-files\Prefetch
Below is the command for auto_rip to parse the program
execution and auto-start artifacts:
auto_rip.exe -s
H:\Data-9-20\WIN-556NOJB2SI8-09.20.13-11.40\nonvolatile-data\registry -n H:\
Data-9-20\WIN-556NOJB2SI8-09.20.13-11.40\nonvolatile-data\registry\lab -u H:\
Data-9-20\WIN-556NOJB2SI8-09.20.13-11.40\nonvolatile-data\registry\lab -c
execution,autoruns
Reviewing the parsed prefetch files revealed a few
interesting items. As shown below there was one executable named 5UAW[1].EXE
executing from the temporary Internet files folder and another executable named
E42MZ.EXE executing from the temp folder.
Looking at the loaded modules for 5UAW[1].EXE prefetch file
showed a reference to the E42MZ.EXE executable; thus tying these two programs
together.
Looking at the loaded modules for the E42MZ.EXE prefetch
file showed references to other files including ones named _DRA.DLL, _DRA.TLB,
and E42MZ.DAT.
These identified
items in the prefetch files are highly suspicious as being malware. Before
moving on to other program execution artifacts the prefetch files were sorted by the last modified time in order to
show the system activity around the time 09/20/2013 15:34:46. As shown below
nothing else of interest turned up.
The parsed program execution artifacts from the registry are
stored in the 06_program_execution_information.txt report produced by auto_rip.
Reviewing the report identified the same programs (E42MZ.EXE and 5UAW[1].EXE)
in the Shim Cache as shown below.
C:\Users\lab\AppData\Local\Microsoft\Windows\Temporary
Internet Files\Content.IE5\I87XK24W\5uAw[1].exe
ModTime: Fri Sep 20 15:34:46 2013 Z
Executed
C:\Users\lab\AppData\Local\Temp\7zS1422.tmp\e42Mz.exe
ModTime: Fri Sep 20 15:34:37 2013 Z
Executed
So far the program execution artifacts revealed a great deal
of information about the possible malware infection. However, there are still
more program execution artifacts on a Windows system that are rarely discussed publicly. One of these artifacts I have been using for some time and
there is nothing about this file on the Internet (not counting the few people
who mention it related to malware infections). The artifact I'm talking about
is the C:\Windows\AppCompat\Programs\RecentFileCache.bcf file on Windows 7 systems.
I'm still working on trying to better understand what this file does, how it
gets populated, and the data it stores. However, the file path indicates it's
for the Windows application compatibility feature and its contents reflect
executables that were on the system. The majority of the time the executables I
find in this artifact were ones that executed on the system. The Tr3Secure Data
Collection Script preserves this file and viewing the file with a hex editor
shows a reference to the 5uAw[1].exe file.

Examine the Auto-start Locations
The first analysis step of looking at the program execution
artifacts provided a good indication the system is infected and some leads
about the malware involved. Specifically, the step identified the following
items:
- C:\USERS\LAB\APPDATA\LOCAL\MICROSOFT\WINDOWS\TEMPORARY
INTERNET FILES\CONTENT.IE5\I87XK24W\5UAW[1].EXE
- C:\USERS\LAB\APPDATA\LOCAL\TEMP\7ZS1422.TMP\E42MZ.EXE
- C:\USERS\LAB\APPDATA\LOCAL\TEMP\7ZS1422.TMP\_DRA.DLL
- C:\USERS\LAB\APPDATA\LOCAL\TEMP\7ZS1422.TMP\_DRA.TLB
- C:\USERS\LAB\APPDATA\LOCAL\TEMP\7ZS1422.TMP\E42MZ.DAT
The next analysis step to perform in the triage process is
to examine the auto-start locations. When performing this step one should not
only look for the malware indicators mentioned previously but they should also
look for the items found in the program execution artifacts and the activity on
the system around those items. To parse most of the auto-start locations in the
registry run auto_rip
against the collected registry hives. The previous auto_rip command parsed both
the program execution and auto-start locations at the same time. The parsed
auto-start locations from the registry are stored in the 07_autoruns_information.txt
report produced by auto_rip. Reviewing the report identified the following
beneath the browser helper objects registry key:
bho
Microsoft\Windows\CurrentVersion\Explorer\Browser
Helper Objects
LastWrite
Time Fri Sep 20 15:34:46 2013 (UTC)
{BE3CF0E3-9E38-32B7-DD12-33A8B5D9B67A}
Class => savEnshare
Module => C:\ProgramData\savEnshare\_dRA.dll
LastWrite
=> Fri Sep 20 15:34:46 2013
This item stood out for two reasons. First, the key's last
write time is around the same time when the programs of interest (E42MZ.EXE and
5UAW[1].EXE) executed on the system. The second reason was because the file
name_dRA.dll was the exact same as the DLL referenced in the E42MZ.EXE's
prefetch file (C: \USERS\LAB\APPDATA\LOCAL\TEMP\7ZS1422.TMP\_DRA.DLL).
Examine File System Artifacts
The previous analysis steps revealed a lot of information
about the potential malware infection. It flagged executables in the temp
folders, a DLL in the ProgramData folder, and identified a potential
persistence mechanism (browser helper object). The last analysis step in the
triage process uses the found leads to identify any remaining malware or files
associated with malware on the system. This step is performed by analyzing the
file system artifacts; specifically the master file table ($MFT). To parse the
$MFT there are a range of programs but for this post I'm using TZworks NTFSWalk.
Below is the command for NTFSWalk. Note: the -csvl2t switch makes the output
into a timeline.
ntfswalk.exe -mftfile H:\
Data-9-20\WIN-556NOJB2SI8-09.20.13-11.40\ nonvolatile-data\ntfs\$MFT -csvl2t > mft-timeline.csv
Reviewing the $MFT timeline provides a more accurate picture
about the malware infection. After importing the csv file into Excel and
searching on the keyword 5UAW[1].EXE brought me to the following portion of the
timeline.
The cool thing about the above entry is that the 5UAW[1].EXE
file is still present on the system and it was the initial malware dropped onto
the system. Working my way through the timeline to see what occurred after the 5UAW[1].EXE
file was dropped onto the system showed what was next.
Numerous files were created in the C:\ProgramData\savEnshare
folder. The file names are the exact same that were referenced in the E42MZ.EXE's
prefetch file. The last entries in the timeline that were interesting are
below.
These entries show the program execution artifacts already
identified.
Confirming the Malware Infection
The triage technique
confirmed the system in question does appear to be infected. However, the last
remaining task that had to be done was to confirm if any of the identified items
were in malicious. The TR3Secure Data Collection Script for a User Account
collected a ton of data from the system in question. This data can be searched
to determine if any of the identified items are present. In this instance, the
ProgramData folder was not collected and the temp folder didn't contain the E42MZ.EXE
file. However, the collected the Temporary Internet Files folder contained the 5UAW[1].EXE
file.
The VirusTotal scan against the file confirmed it was
malicious with a 16
out of 46 antivirus scanner detection rate. The quick
behavior analysis on the file using Malwr not only shows the same activity
found on the system (keep in mind Malwr run the executable on XP while the
system in question was Windows 7) but it provided information - including
hashes - about the files dropped into the ProgramData folder.
Malware Incidents Triaging Conclusion
In this post I demonstrated one method to triage a system
for a potential malware incident. The entire triage process takes less than 30
minutes to complete (keep in mind the user profile collection time is dependent
on how much data is present). This is even faster than a common technique
people use to find malware (conducting antivirus scans) as I illustrated in my
post Man
Versus Antivirus Scanner. The demonstration may have used a test system but
the process, techniques, tools, and my scripts are the exact same I've used
numerous times. Each time the end result is very similar to what I
demonstrated. I'm able to answer the triage questions: is malware present on
the system, how did it get there, what's the potential risk to the
organization, and what are the next steps in the response.
Sunday, September 15, 2013
Posted by
Corey Harrell
 There are a few movies I saw in my childhood that had an impact on me. One of those movies was Back to the Future. To this day I still have vivid memories leaving the theater after watching it and being filled with wonder and excitement. The final scene in the movie is relevant to the discussion about triage scripts. In the scene, Doc reversed his time-traveling DeLorean onto the road. Marty sitting in the passenger seat says "hey Doc you better back up we don't have enough road to get up to 88". Marty's comment was based on his previous experience with the DeLorean. The car had to reach a speed of 88mph to time travel and to reach that speed required enough road to drive on. Doc said to Marty in response "Roads? Where we're going we don't need roads". Then the time-traveling DeLorean lifted off of the road and flew back at the screen. Whenever I think about triage scripts I paraphrase Doc to myself saying "Hard drives? Where we're going we don't need hard drives". My updated Tr3Secure collection script makes this statement a reality for triaging systems; it makes it possible to go in a direction where we "don't need hard drives".
Re-introducing the Tr3Secure Volatile Data Collection Script
Sometime ago I released the Tr3Secure Volatile Data Collection Script and accompanied the release with the blog post Dual Purpose Volatile Data Collection Script describing it. The script's focus was on the collection of volatile data only and it served a dual purpose. "First and foremost it had to properly preserve and acquire data from live systems". "The second required function was the tool had to help with training people on examining volatile data". The script served its dual purpose but it had its limitations. As a result, I overhauled the script with a focus on improving its capability as a triage tool. In the process as it evolved its name change to properly reflect what the tool is; meet the Tr3Secure Data Collection Script.
Tr3Secure Data Collection Script
It's probably easier to say what in the script remained the same than it is to say what is new. For the practically usage the script retained its: flexibility, organized output, documentation in a collection log, and preservation according to RFC 3227. For the training usage, the script retained the ordered output reports and references pointing to the books Windows Forensic Analysis, 2nd edition and Malware Forensics: Investigating and Analyzing Malicious Code for the volatile data collection. Before going into the changes I have to give a shout out to Troy Larson. Some of the new functionality in this script where inspired by his ideas and the wicked cool For loop to grab the user profile registry hives is his. Now let's move on to the changes starting with the minor updates followed by the significant upgrade.
Minor Updates
The first noticeable modification is the way the script executes. I dropped the need to interact with the script to make it execute with command-line syntax for complete automation. Now you can enter one command to collect volatile data, non-volatile data, or image the memory. Speaking about imagining memory leads me to my next change. I dropped Memoryze and went with the winpmem program. The last minor update I wanted to highlight was an addition to the preservation activities. When the script runs it tries to preserve certain data to prevent evidence from being overwriting. I added the collection of two more items; one of which is the NTUSER.DAT registry hive of the user account running the script. For the other minor updates refer to the change_log.txt accompany the scripts.
Significant Upgrade
The original Tr3Secure Volatile Data Collection Script focused on collecting volatile data such as open files, network connections, and running processes. The one area that I felt was lacking was the script's ability to collect non-volatile data. When I approached upgrading the script I asked myself one simple question. What data would I want from the hard drive if I couldn't have the entire hard drive? The end result is very telling by my paraphrasing the Back to the Future quote: "Hard drives? Where we're going we don't need hard drives". Below is a highlight of the new data collected by the Tr3Secure Data Collection Script.
- Grabs the partition information
- Images the MBR (to help with MBR infectors)
- Images the hard drive from the MBR to the sector of the first partition (to help with MBR infectors)
- Collects all registry hives. By all I mean the ones in the config folder, Regback folder (for Windows 7), and the hives from every user loaded user profile
- Grabs select Windows event logs and in Windows 7 the entire log folder
- Grabs the scheduled tasks
- Grabs the NTFS artifacts $MFT and $LogFile. I opted to go with RawCopy from my post Tools to Grab Locked Files
- Grabs the group policies applied to the system
- Grabs the McAfee logs and quarantine folder (this is for demo purposes and should be customized for your environment)
Tr3Secure Data Collection Script Syntax
Viewing the script with a text editor shows the syntax on how to use the script and all of my detailed comments. Below is syntax to run the script:
tr3-collect.bat [case number] [drive letter for storing collected data] [menu selection #]
[case number] = the unique identifier for the case
[drive letter for storing collected data] = drive letter of where the collected data is to be stored
[menu selection] = optional field and can be used to collect the following:
1 = Acquire Memory Forensic Image
2 = Acquire Volatile Data
3 = Acquire Non-Volatile Data
4 = Acquire Volatile and Non-Volatile Data (default)
5 = Acquire Memory Forensic Image, Volatile, and Non-Volatile Data
i.e.
tr3-collect.bat 2012-09-14_1 F
tr3-collect.bat 2012-09-14_1 F 3
A cool thing to keep in mind. The drive letter to store the collected data can either be a removable media attached to the system or a mapped drive to a network share.
Tr3Secure Data Collection Script for User Account
In my talk Finding Malware Like Iron Man I walked through a mock scenario responding to a system and triaging it for malware. One of the comments I made was that it is faster and more efficient to collect data either by going over the wire or using collection script. Being an incident responder time is of the essence so taking the time to remove and image a hard drive takes too long. Some may see the new functionality in the Tr3Secure Data Collection Script and say to themselves. Wait a second, you aren't collecting certain data so the hard drive is still needed. Those who said this to themselves are correct and my response to them is to check out the new script that accompanies the Tr3Secure Data Collection Script. The Tr3Secure Data Collection Script for User Account collects data from a specified user profile on the system. Below is a highlight of the data collected.
- Grabs the Recent folder contents to including LNK files and jump lists
- Grabs the LNK files in the Office Recent folder
- Grabs the Network Recent folder contents
- Grabs the entire temp folder (great location to find attack vector artifacts)
- Grabs the entire Temporary Internet Files folder
- Grabs the PrivacIE folder (to see why check out my post Malware Root Cause Analysis)
- Grabs the Cookie folder
- Grabs the Java Cache folder contents (Java anyone)
One thing I wanted to be clear about why this second script was needed. In corporate environments and to a certain extent systems used by home users there are multiple loaded user profiles on a system. Pretty much on ever single examination I've done over the last five years my interest has only been on one or two user profiles. The other profiles were old and left on the system. Trying to collect the above data from every loaded user profile is not only inefficient but takes way too much time. Time that is better spent responding to the system as opposed to waiting for the collection script to finish. As such, I put the collection of the user profile data in a separate script so it can be run against the one or two user profiles of interest.
Tr3Secure Collection Script for User Account Syntax
Viewing the script with a text editor shows the syntax on how to use the script and all of my detailed comments. Below is syntax to run the script:
tr3-collect-user.bat [path to store collected data] [user profile name]
[path to store collected data] = the path to store the collected data without any quotes or spaces
[user profile name] = the user account's profile name to collect data from
i.e.
tr3-collect-user.bat F:\Data-demo2\computername-08.12.13-19.14 jsmith
Similar to the Tr3Secure Data Collection Script, the path to store the collected data can either be an attached removable media or a mapped network share.
Where Are We Going
When I made my comment in my Finding Malware Like Iron Man presentation it was because of the capability I have with these triage scripts. I first run the Tr3Secure Data Collection Script to grab the volatile and non-volatile data followed by running the Tr3Secure Data Collection Script for User Account to collect the user data. Both scripts are pretty fast and they provide me with all of the data I would need to triage a system. I can even leverage the triage technique I outlined in the presentation against the collected data to find malware and do root cause analysis in less than 20 minutes. Not bad and hopefully my Back to the Future reference now makes a little more sense: "Hard drives? Where we're going we don't need hard drives".
You can download the TR3Secure Data Collection Script from the following download site.
Saturday, December 3, 2011
Posted by
Corey Harrell
A few quick updates about some things related to the blog …
Digital Forensic Search (DFS) Updates
I updated the Digital Forensic Search’s index today. Eight new blogs were added and I updated the URL for an existing blog. In no particular order the new editions are: Sketchymoose's Blog, Forensics For the Newbs, WriteBlocked, Hexacorn Blog, Zena Forensics, Taksati, Chris Sanders, and SANs Penetration Testing Blog. As usual, the Introducing the DFS blog post has been updated to reflect the changes.
I’m going to continue documenting the sites in the index on the Intro to DFS post. However, I’m probably going to stop posting updates on the blog since I’m leaning towards mentioning the changes through my twitter account.
I’m Now on Twitter
Earlier in the week I finally finished setting up my Twitter account and actually started to use it. As my profile indicates Twitter is my platform to share random thoughts which will mostly be focused on information security. I said mostly because the account won’t solely be used to discuss security. Please feel free to hit me up at corey_harrell.
A Different Approach to Analyzing Volume Shadow Copies
In a few weeks I’m going to have some time off from work since I’m taking some “furlough” days. My plan is to spend the time putting together some material (blog posts and videos) to further demonstrate a different approach to analyzing the data stored volume shadow copies.
Before discussing my approach I’m pointing out two current approaches. One is to image each VSCs then examining the data in the images. Another approach is to copy the data - including metadata - from all or select VSCs so it can be examined outside the VSCs. The approach I’ve been using is to examine the data while it’s still stored in the volume shadow copies. There are numerous benefits doing it this way such as reducing the amount of time needed or being able to work on both live systems and forensic images. I think the technique’s true power is the ability to see the same data at different points in time since shows how the data changed over time. This has been critical for me on a few different cases.
To help me examine VSCs in this manner I wrote a few different scripts. The material I’m putting together will not only explain my logic behind the scripts’ functionality but will show how it can be easily extended by anyone to meet their own needs. Yes, I'll also release the scripts as well. Plus, if I can pull off a video or two it should be cool for people to see it in action.
What’s TR3Secure?
At some point over the next few months you may see me start referencing and sharing some work I completed for something called TR3Secure. I’ll be the sole author of any work I share (mostly scripts) but I wanted to briefly discuss what TR3Secure is since I’ll be tagging my work with it. A few co-workers and a colleague of mine are working on setting up a training group for us to collaborate and develop our information security skills together. We are trying to create an environment to bring together security testers, incident responders, and digital forensic practitioners. We envision doing different activities including conducting live simulations and this is where bringing together the three different skillsets will shine. The live simulations will be conducted with select people attacking a test network while a second group responds, triages the situation, and if necessary contains the attack. Afterwards, the examiners will collect and examine any evidence to document the attack artifacts. When it’s all said and done then everyone will share their experiences and knowledge about the atack and if necessary train other members on any actions they completed during the simulation.
We are still in the early stages setting the group up and once established it initially has to be a closed group. I’m only mentioning TR3Secure here because I’m going to write various scripts (Perl and Batch) to help with certain aspects of the live simulations. If my scripts work well especially for training then I’ll share it for others to use for self training purposes. The scripts will solely be my own work but I’m still tagging everything with TR3Secure since I’m working with some great individuals. The first item coming down the pipeline is a cool dual purpose volatile data collection script that doubles as a training and incident response tool.